As part of the Holiday 1, 2, 3 series, I have another look for you to SLAY this holiday season! Today’s holiday look is a twist on a natural girl’s most coveted hairstyle, “The Classic Curly Fro.” I achieved this style using the 3 strand twist method which I opted for as opposed to regular 2 strand twists because it adds more definition and longevity to the style. This “classic do” just adds that naturalista stand-out-flavor to any outfit or makeup look, for any occasion! What better time to shine then during this holiday season!
I started this look off with freshly washed hair (stay tuned for an upcoming blog post on my wash day routine) and began styling. Here are my 5 simple steps:
1: Section it off
The first step in this process is to section (or part) the hair in preparation for your twists. Fortunately, curly hair is forgiving and we don’t need to be too meticulous about our parts but there are a few things I like to do to achieve my desired shape.
PLEASE don’t part your hair straight down the middle and then make the twists from the 2 sections at the sides of yo’ head!
I have learned the hard way that you end up with an unforgivable part that doesn’t want to budge no matter how much you fluff and separate your hair. I section my hair into the following 6 sections to ensure that I achieve my desired shape every time.
For the front of my hair, I went with a middle part. Do what works best for you, I just love doing a middle part with this look because it’s just easier for me to create my bang and I could easily tuck my bangs to the sides if I want my hair out of my face, a 2-in-1 situation.
(Insert 2 side-by-side photos of hair with bang and hair with bangs swept aside)
2: How Curly? Determining the Size
Next, we’re going to take each section and separate them into smaller sections to begin twisting. This is
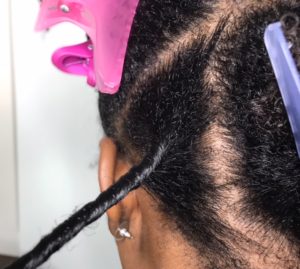 a fundamental step because the size of the twists will alter the curl pattern. We are going for some tighter curls so our sections are going to be more on the medium sized end of the spectrum. How curly do you want to go?!
3: Moisturize! Moisturize! Moisturize!
It’s the holiday season, so you know it’s cold!! For those cold winter months, nothing can be more important than keeping your hair moisturized. During this time especially, I make sure to use supple moisture-rich products to keep my hair nourished. This time around I went with some of my most favorite products, period.
When moisturizing, I have found that the L.O.C. method works best for my hair (Leave-in, Oil, and Cream). I start by taking a small section of hair and I apply a dime size amount of each product to the section. Here’s what I used:
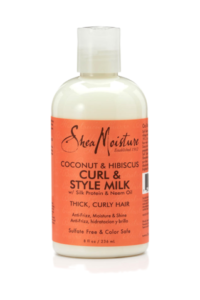 Leave – In: I had to go with my ride-or-die leave-in conditioner for today, my Shea Moisture Coconut and Hibiscus Curl and Style Milk with Silk Protein and Neem Oil. I can’t say enough great things about this product! Whether I use it on wet hair or dry hair, it always ends up feeling super silky smooth. This is my go-to leave in cream!
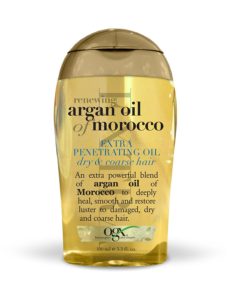
Oil: I followed that up with my Ogx Renewing + Argan oil of Morocco Extra Penetrating Oil blend. I use this or my trusty Extra Virgin Olive Oil, they both get the job done very well, penetrating through the hair strands while locking in the moisture.
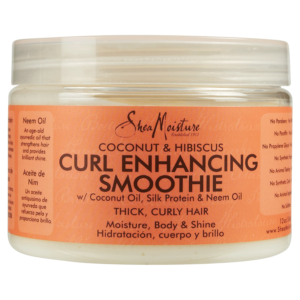 Cream: To finish up this moisture routine, I add in the cream. I love to keep it in the family so I opted for my Shea Moisture Curl Enhancing Smoothie with Silk Protein and Neem Oil from the same line as the leave-in. I find that products almost always work up to their full potential when used with other products from their line.
*Gel: I skipped this step, but for a little extra hold, you can add a small amount of your favorite styling gel.
4: Twist It! 3 Strand Twist Method
Once my hair is fully moisturized it’s time to start twisting. The 3 strand twist can seem very hard and it’s even harder to explain, but I assure you it’s easier than it looks. I figured I could show you much better than I can tell you! While looking at the below tutorial, say this to yourself, “Hook it – Bring it all the way over – Bring the other sections down the line (like a conveyor belt).” Also note, that you want to get as many twists on that section as possible, so make sure your twisting nice and tight.
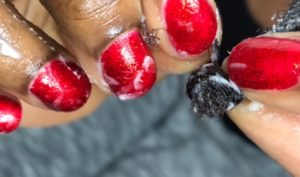
So, there’s one more step (trust me it’s necessary)…I always finish my braids or twists, whatever I decide to go with that day, with what I call a hanging bantu knot. It’s just as it sounds, I finish twisting all the way to the end of the section and then I add a bantu knot to the end. This ensures that there are no straight ends and that the ends of the twist are ultra-curly and defined once taken down.
Once I complete all my twists, I cover my head with my silk bonnet in preparation for the next day’s take down.
5: Take Down, Fluff & Stunt
The next day, I go for the take down using the Ogx oil. I carefully take down the twists, being careful not to disturb those beautiful curls, and then I fluff until my heart’s content.
Once I have achieved my desired level of big hair, I bring the two 2 front sections of my hair together, concealing the middle part, and then I place 2 to 3 bobby pins about an inch behind the hairline to create my bang.
(Insert Pic of how I create bangs)
Maintenance: Maintain this style by pineappling the hair (placing a loose ponytail at the tippy top of your head) or re-twisting in larger sections, then covering your hair with a silk bonnet.
That’s it for this classic look! What classic styles do you like to rock for the holidays? Let me know in the comment section below!
Thanks for reading my loves!
Christina
(Insert Pic of Finished Look with Kissy face)
